Awakening: Moonfell Wood: Chapter Six: The Griffins Eyrie
Awakening 2 Moonfell Wood Walkthrough guides you through the game as you help the princess travel through Moonfell Wood. All levels are covered and feature detailed images of the puzzles for when you get stuck.
General Info and Tips
Chapter One: The River
Chapter Two: Teardrop Falls
Chapter Three: The Moonbridge
Chapter Four: Herb Garden
Chapter Five: The Witches Tower
Chapter Six: The Griffins Eyrie
Awakening 2: Der Mondenwald Abschnitt 1
Awakening 2: Der Mondenwald Abschnitt 2
Awakening 2: Der Mondenwald Abschnitt 3
Ask for help in the comments below!
Witches Tower – Middle Floor
- Examine the fireplace
- Put the wood in the fireplace
- Use the pocket dragon to light it
- Put the kettle over the fire
- Use the gloves to take the hot kettle
- Place the herbs in the teapot on the table
- Use the hot kettle on the teapot
- Go up to the rooftop
Witches Tower – Rooftop
- Give the teapot to Mysterious Goblin
- Play a game of Tripeaks
- Take the scythe
Pavilion
-
Use the scythe on the vines
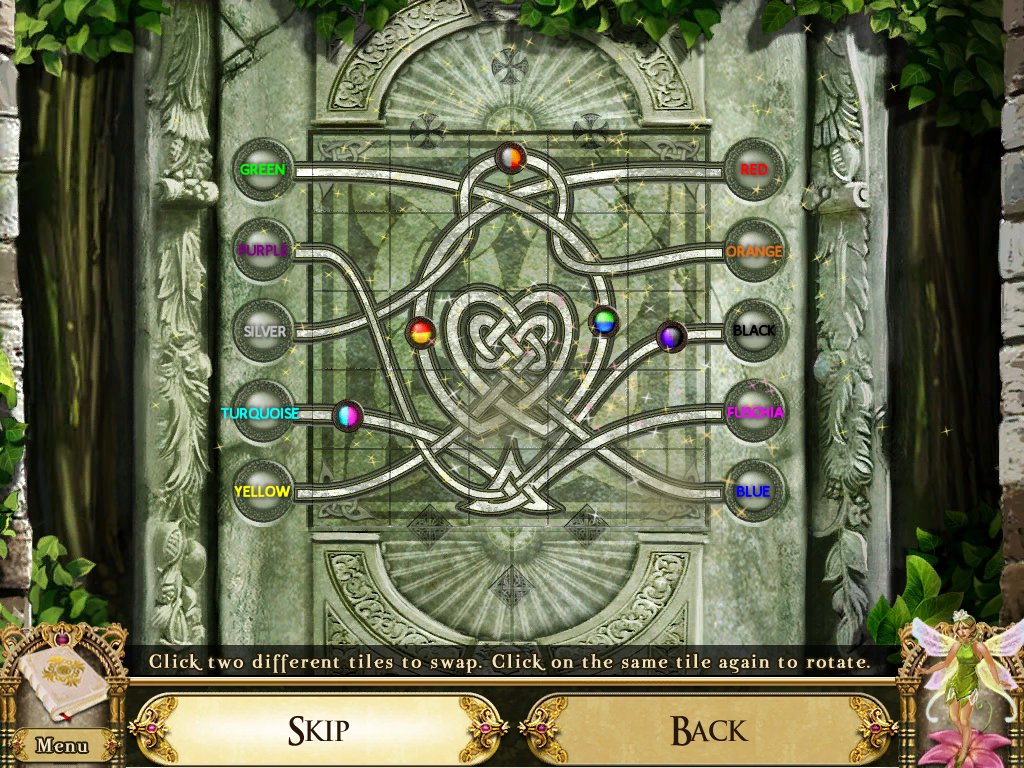
- Examine the door – puzzle
- Swap the tiles to create a pattern
- Click once to rotate
- Arrange the symbols
- Follow the lines from each symbol and make sure the top/bottom colors match
- You need to swap the side colors
- Go through the door
Root Passage
- Go up to root chamber
Root Chamber
- Examine the earthen alcove
- Take the bust
-
Examine the picture on the wall – puzzle
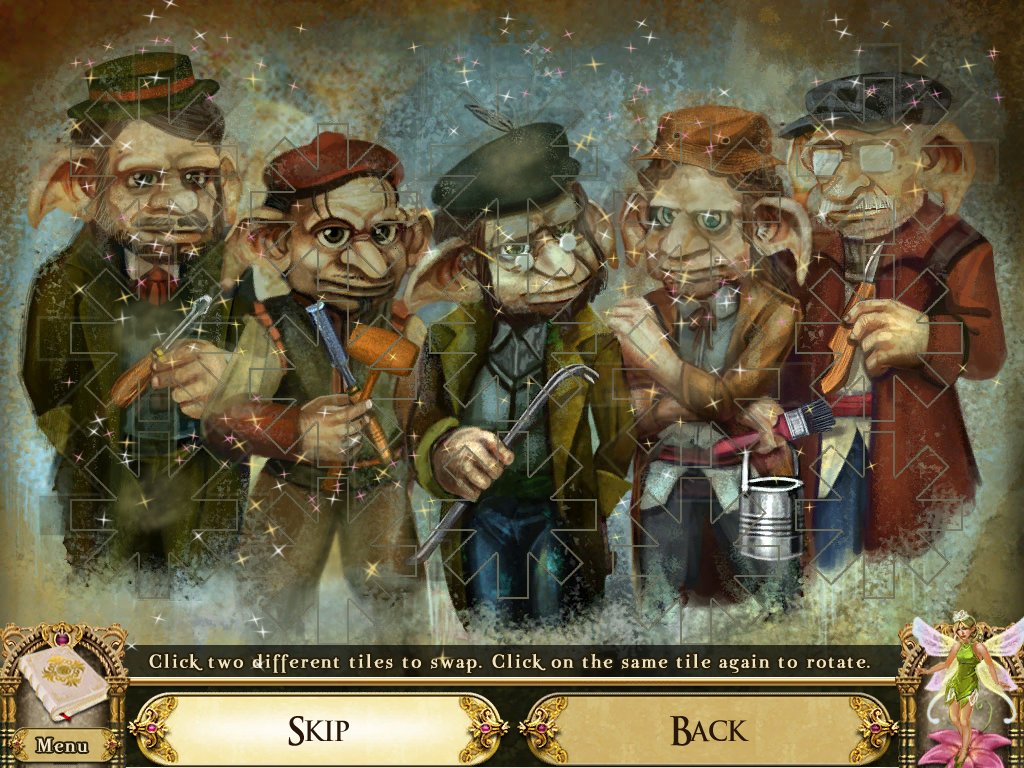
- Rotate and swap the tiles to complete the picture
- Take varnish kit
- Examine the lectern – puzzle
- Find the matches
- Take the symbols
-
Examine the bookshelf – puzzle
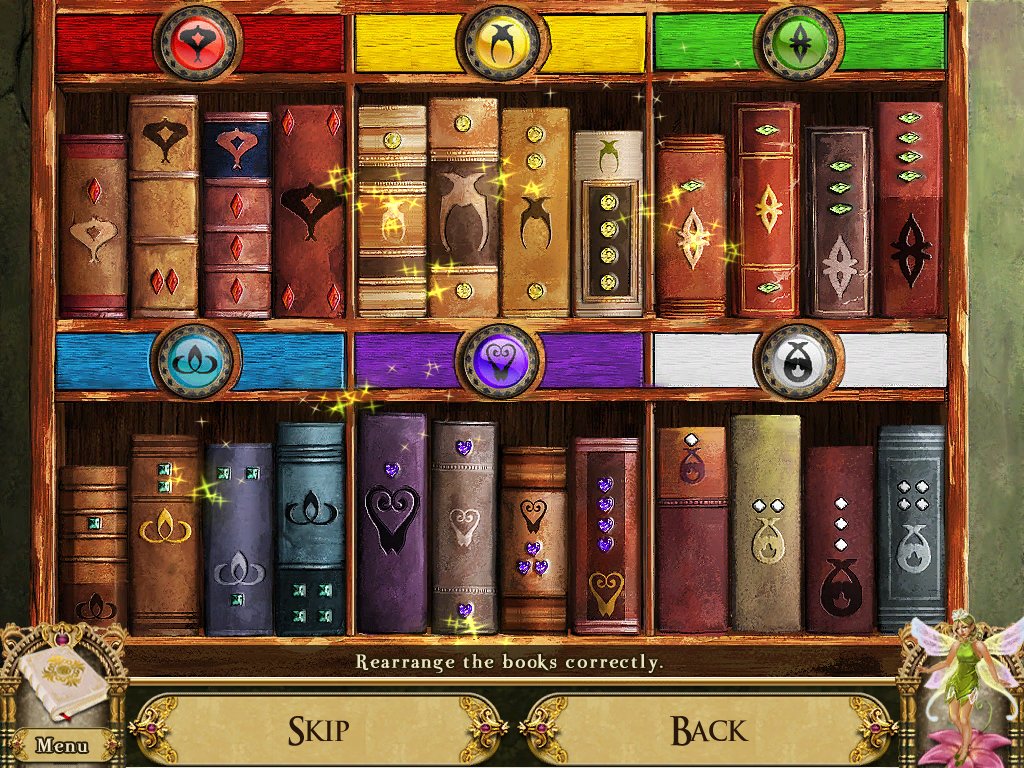
- Place the matching colors in the empty holes
- Arrange the books by matching the symbols on the backs to the symbol above the shelf
- Then arrange the books by the number of gems on the back from 1 – 4
- Examine workbench – hidden object area
- Take woodcarvers guide
- Examine the drawers
- Open the bottom drawer
- Take the wood chisel and screwdriver
- Use chisel and screwdriver on top drawer
- Take wood mallet and knife
- Examine the rug
- Use the screwdriver on the grate
- Use the crowbar on the grate
- Find the objects listed at the bottom
- Go right to the root balcony
Root Balcony
- Examine the overgrown roots
- Use the knife on the roots
- Take the bust
- Examine the workbench
- Take the bust
- Take the sandpaper
-
Place the guide on the stand – puzzle
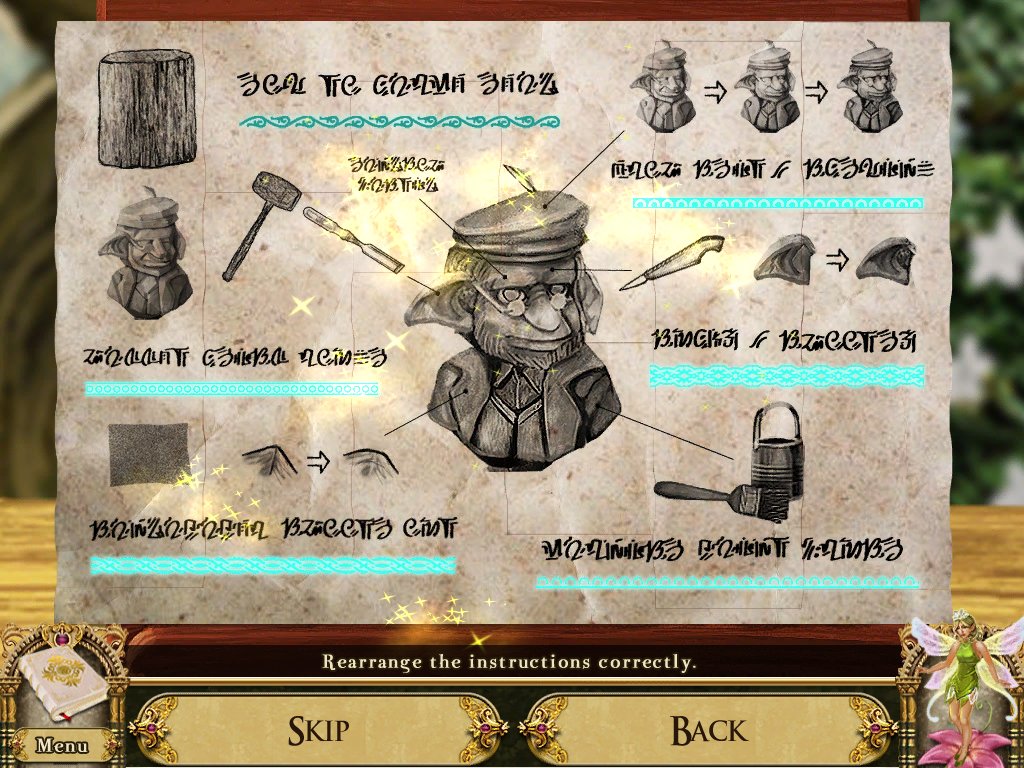
- Swap the pieces to create the guide
- Return to the root chamber
Secret Passage
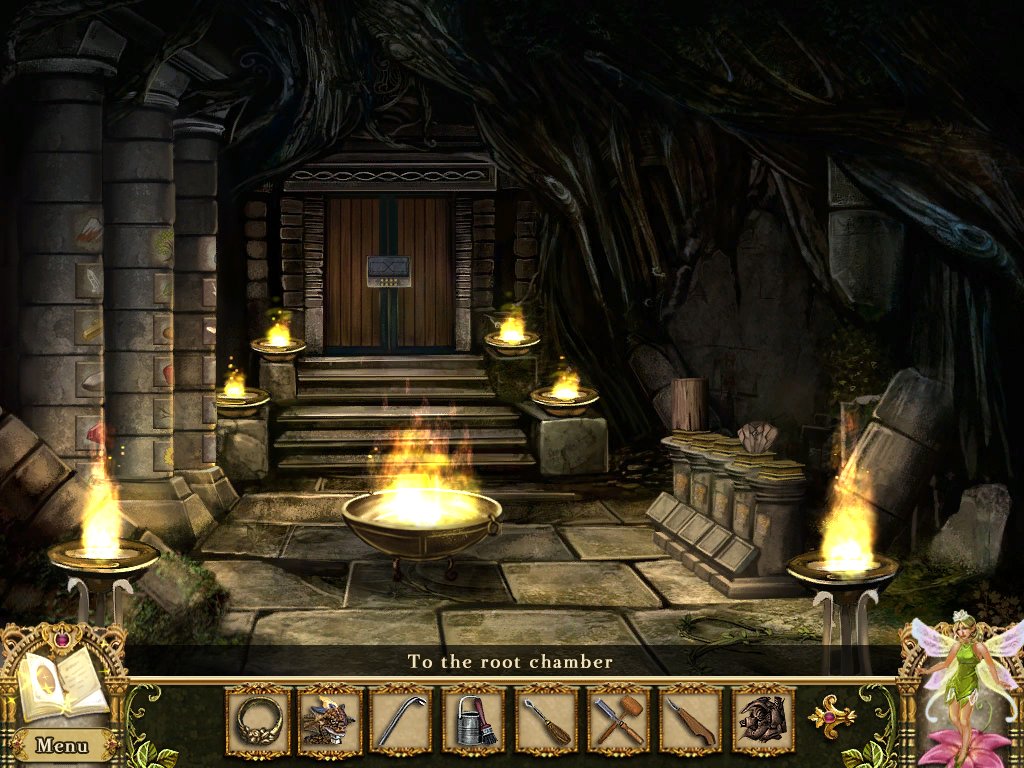
- Use the pocket dragon to light the seven braziers
-
Examine the pillars – puzzle
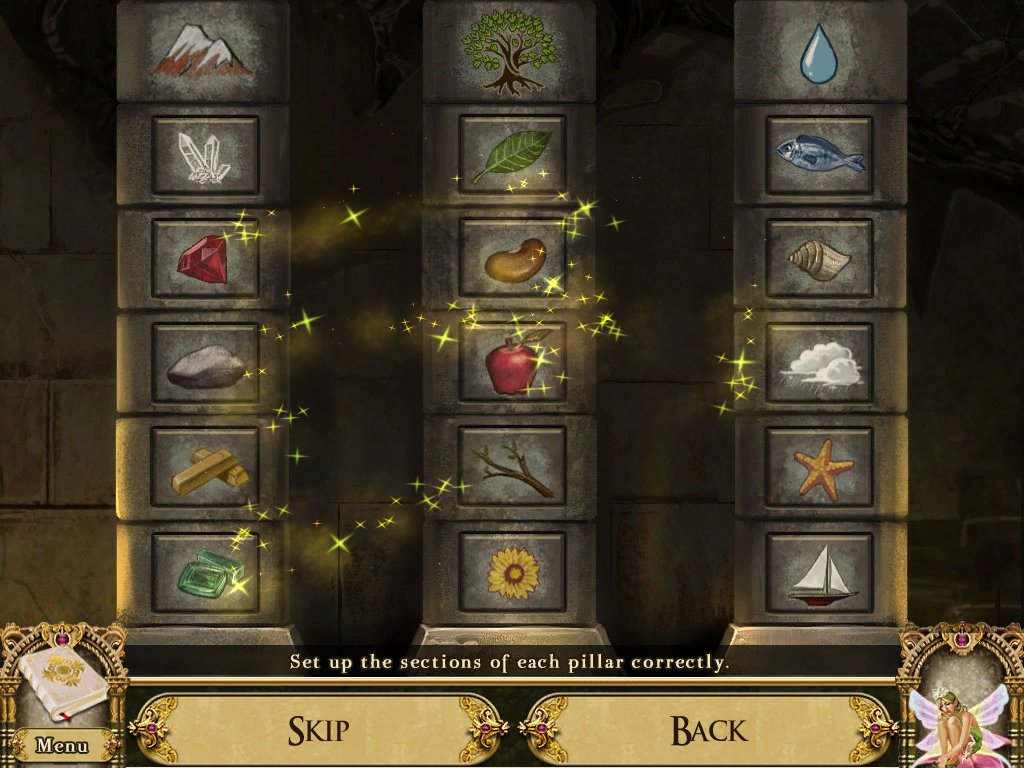
- Click a tile to change the image
- Put the images in the correct order
- Use the image at the top as a clue
- Take the brass pieces
- Examine the stone pedestal
- Take the block of wood
- Return to the root balcony
Root Balcony
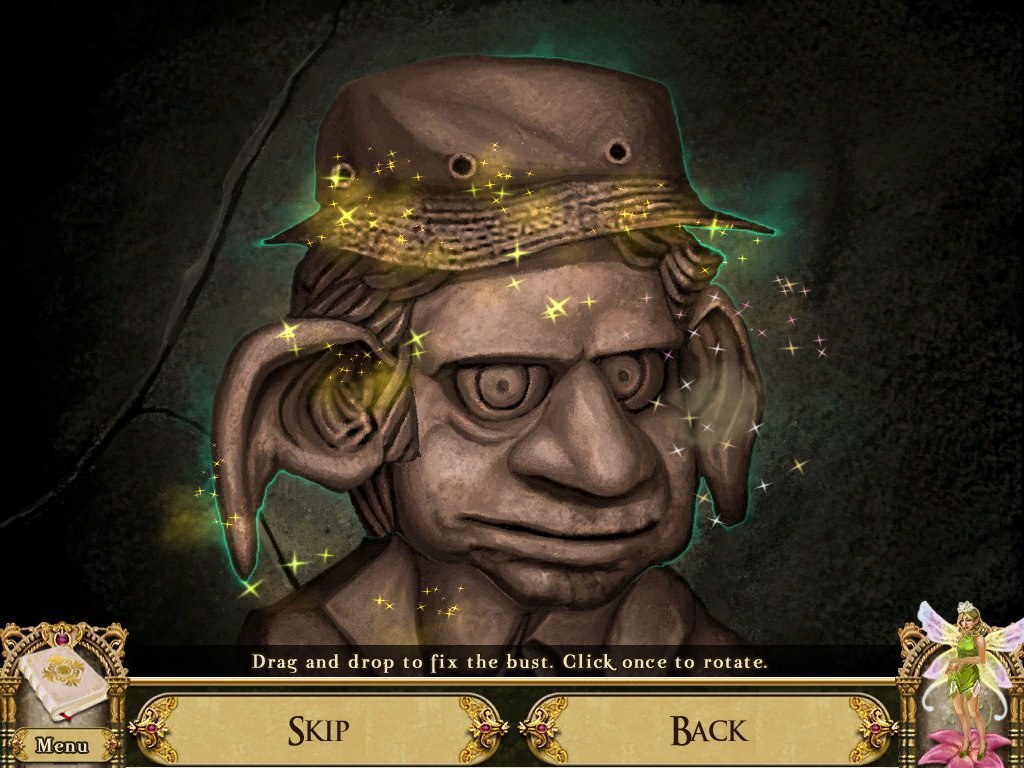
- Examine the workbench
- Place the block of wood on the bench
- Use the hammer and chisel
- Use the knife
- Use the sandpaper
- Use the varnish
- Take the finished bust
- Return to the secret passage
Secret Passage
- Examine the stone pedestal
- Place the bust pieces on the partial bust – puzzle

- Reassemble the bust
- Place the busts on the stands
- Place the tools on the stands
- Look in your journal and examine the picture of the goblins
- Rearrange the gobbling heads, bodies, hats and tools to match the picture
- Take the brass pieces
-
Examine the door – puzzle
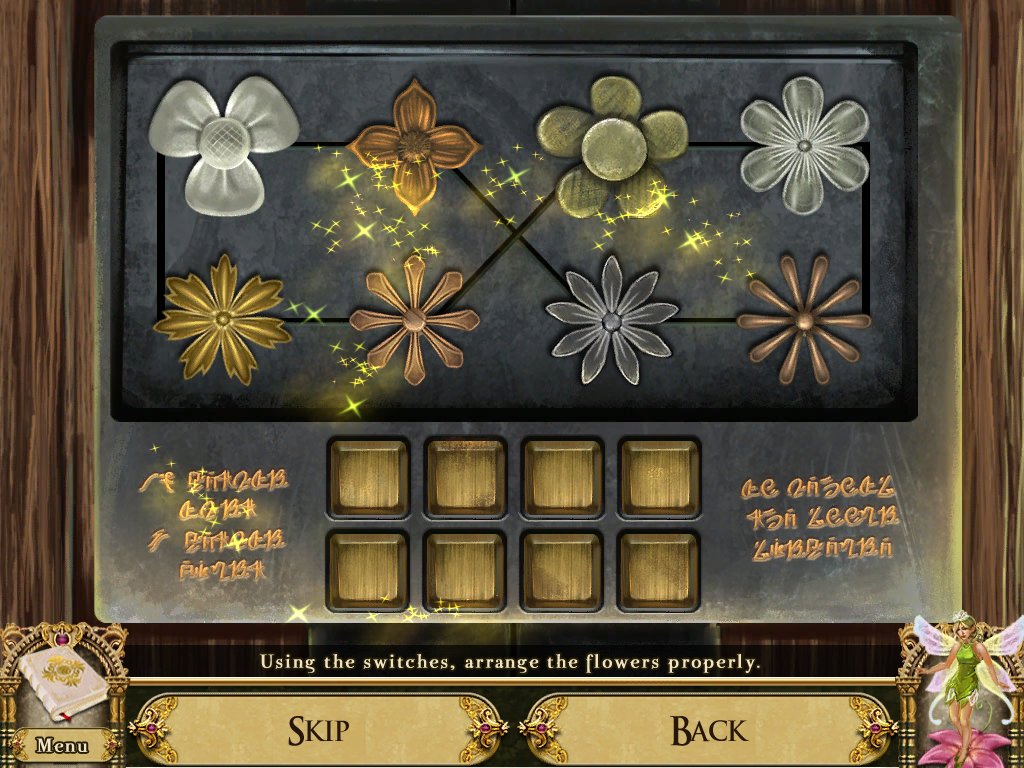
- Use the brass pieces on the door
- Read the writing
- "Ten petals last, three petals first, lo and behold the doors disperse”
- Use the buttons at the bottom to move the flowers
- Line them up from 3 – 10
- Enter the griffins eyrie
Griffins Eyrie
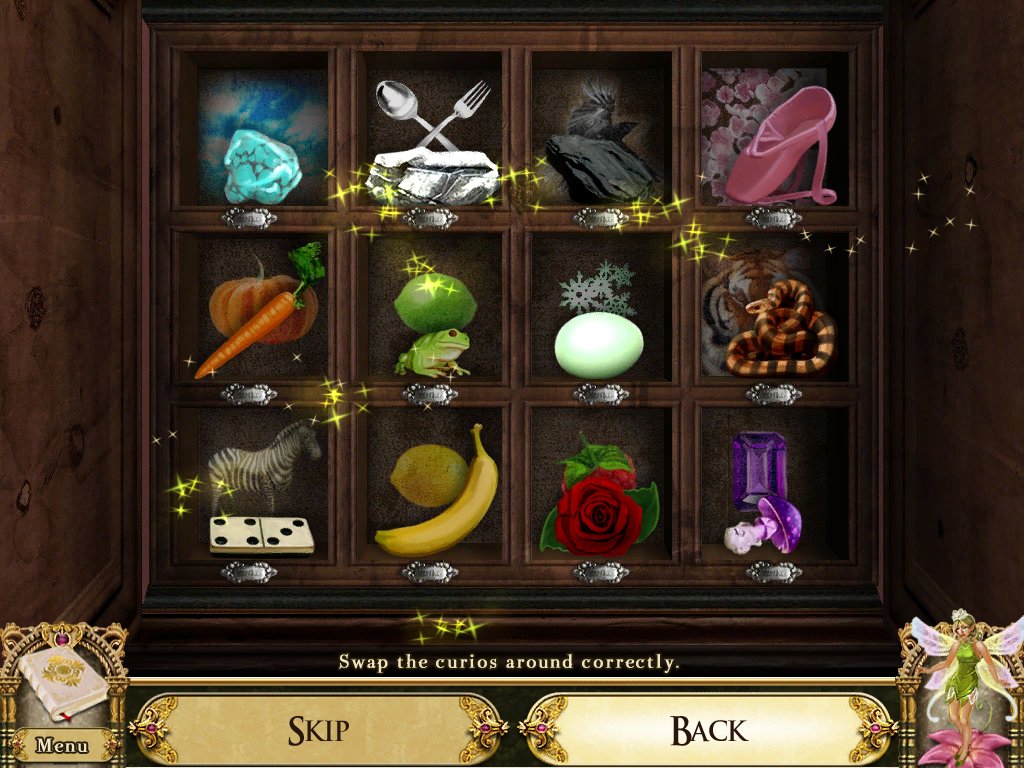
- Examine the chest – puzzle
- Turn over the tiles and match them
- Match the items by color
- Take the silver ingot
-
Examine the armory – puzzle
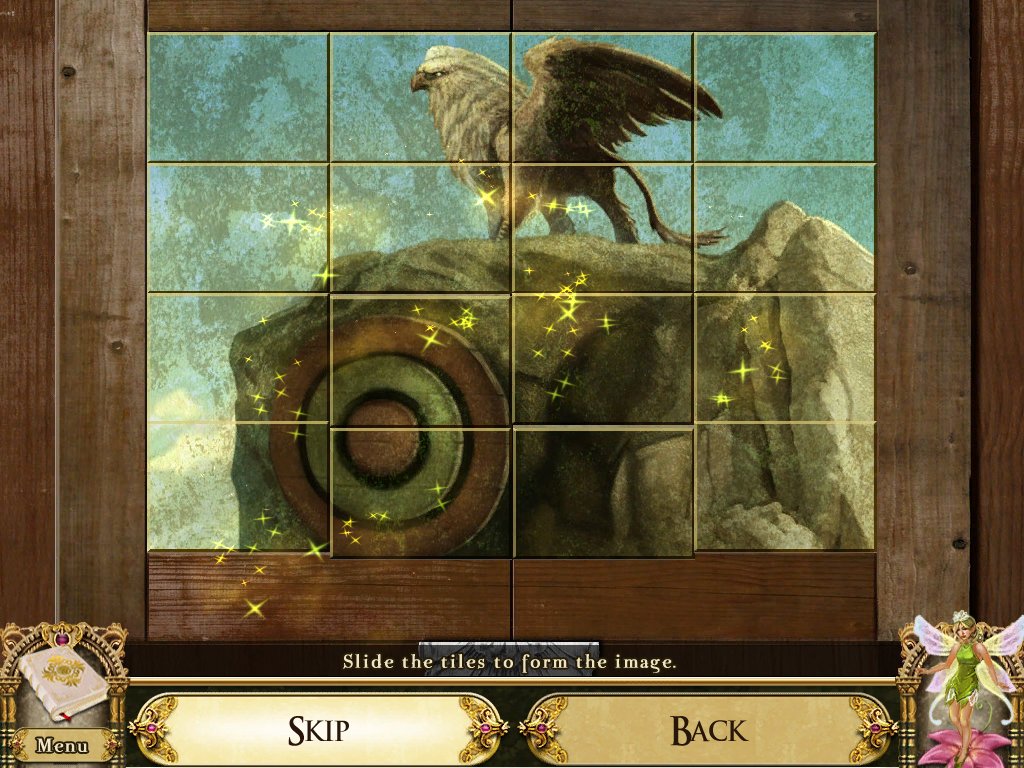
- Slide the tiles to create a picture
- Take the bow and arrow shafts
-
Examine the upper doors – puzzle
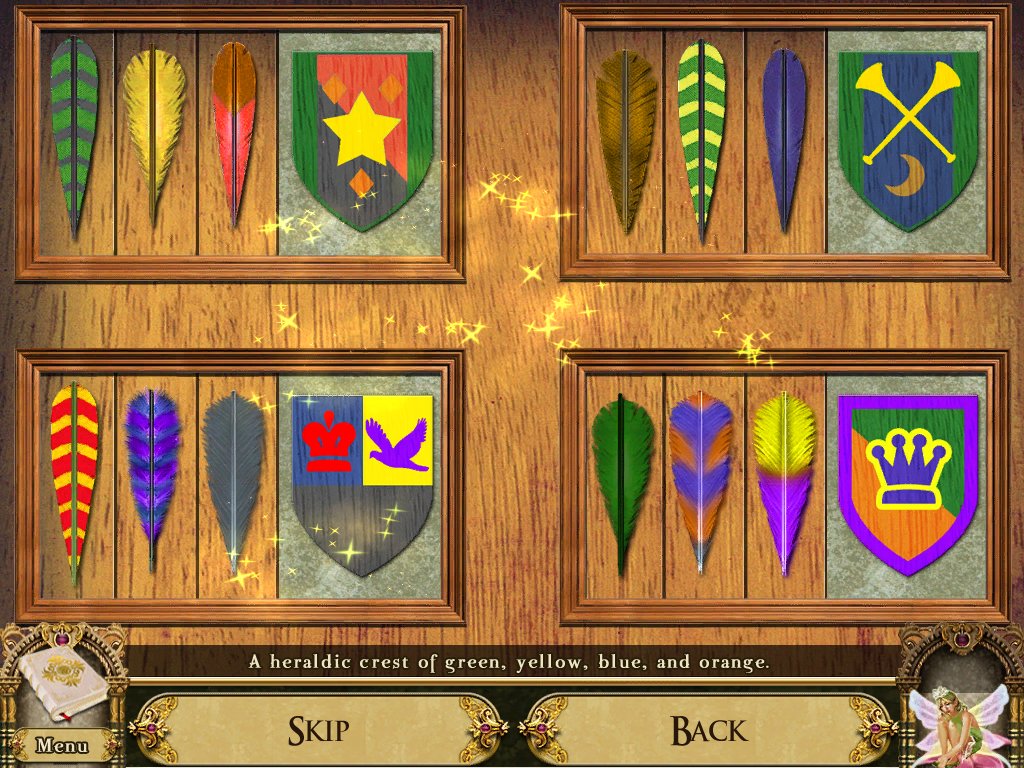
- Swap the feathers so the match the crest
-
Examine the bottom drawers – puzzle
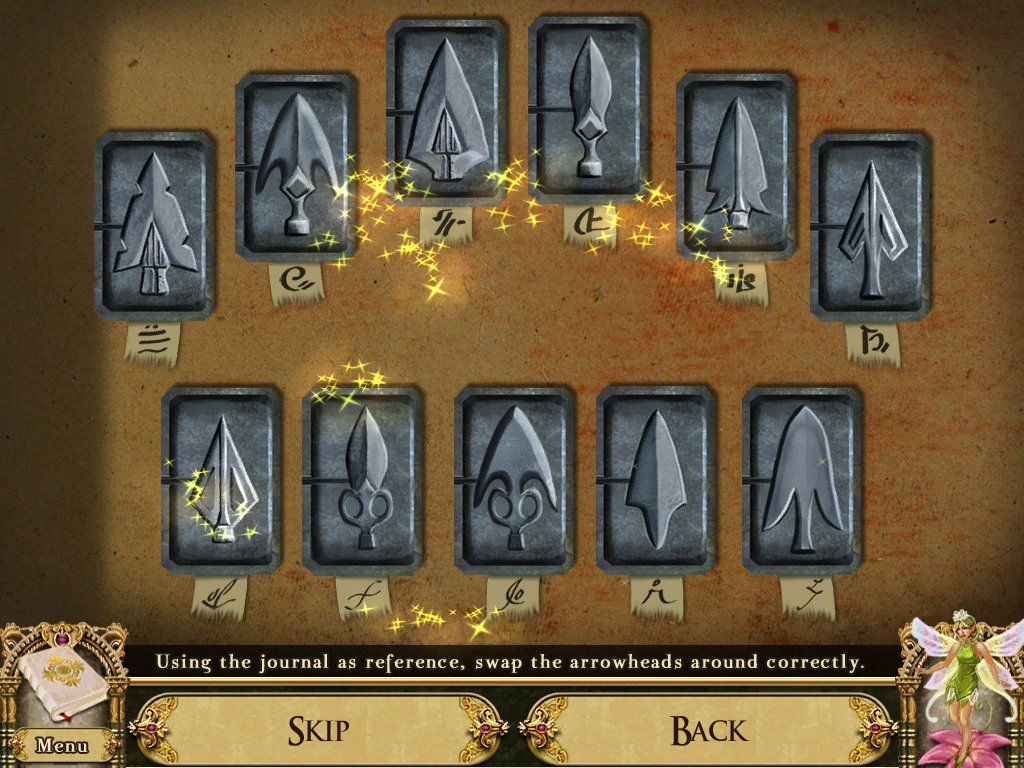
- Look at the etchings in your journal
- Swap the arrow heads to match the order of the symbols
- Examine the griffins mold
- Place the ingot in the top and the arrow mold in the bottom
- Use the pocket dragon to melt the ingot
- Take the arrow head
-
Shoot the arrow at the target on the rock under the Griffin
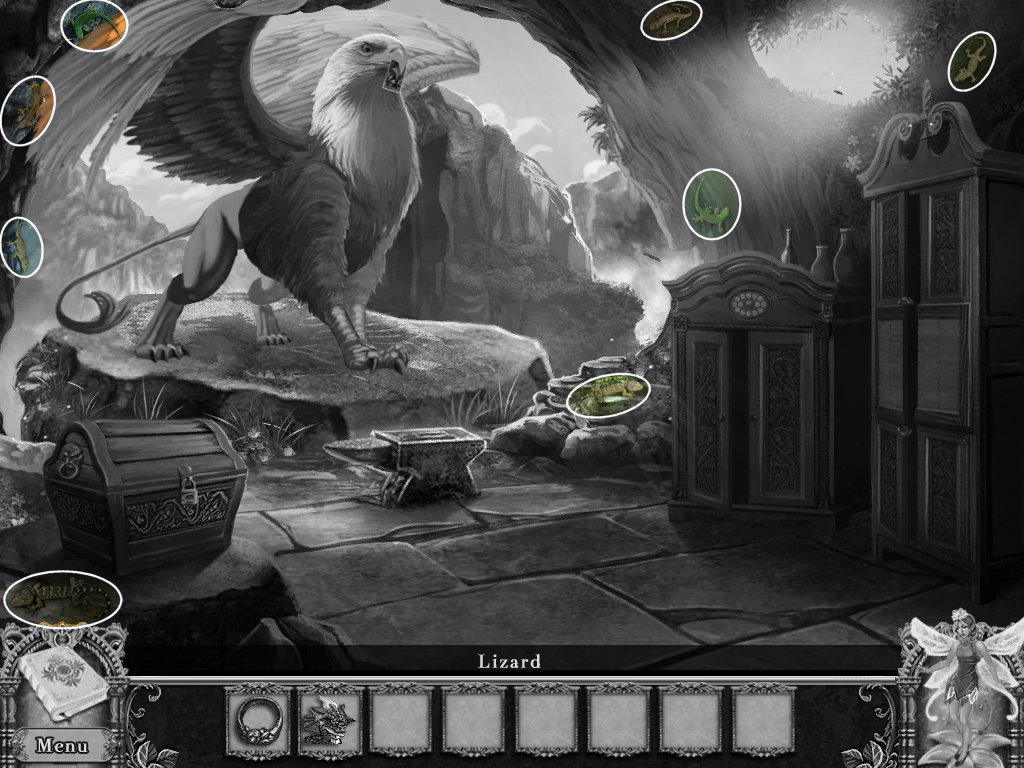
- Find eight lizards
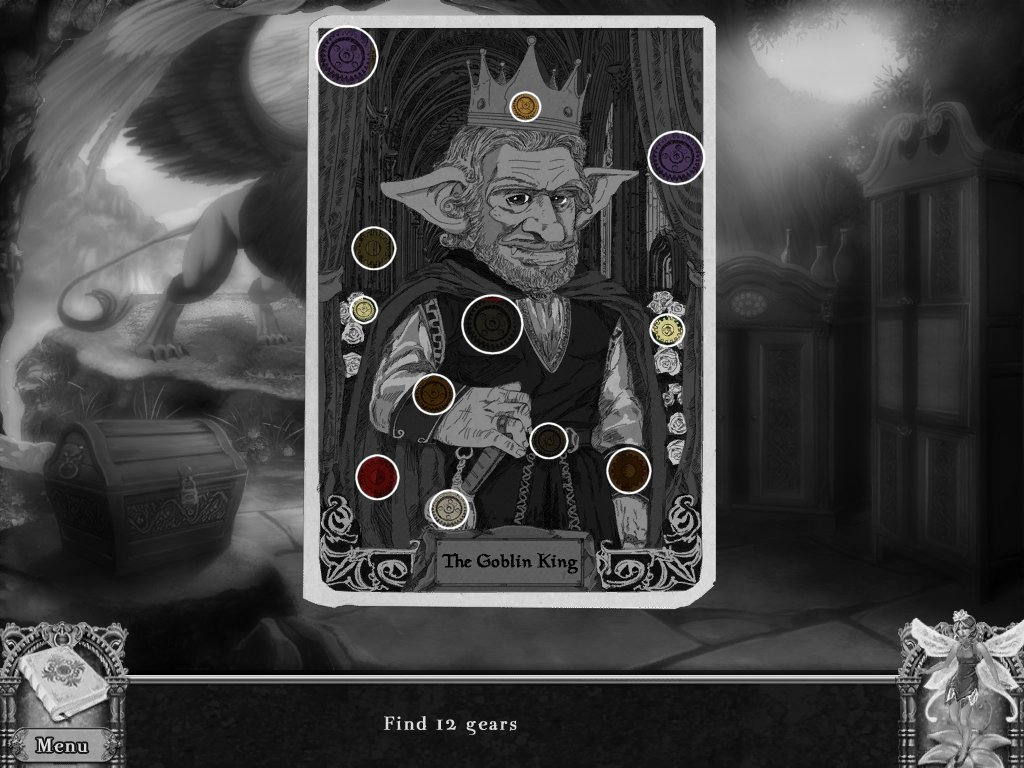
- Find twelve gears (witches card)
- Return to the pavilion
Pavilion
- Place the last card in its spot
- Talk to the witch
- Take the key
- Return to the griffins eyrie
Griffins Eyrie
- Examine the chest
- Use the key on the chest
- Take the griffins saddle
- Examine the map – puzzle
- Match three like symbols
- Clear the board
- Use the saddle on the Griffin
- Show the map to the Griffin
- Read your journal
- Click on the Griffin
- Fly away…
The End?
General Info and Tips
Chapter One: The River
Chapter Two: Teardrop Falls
Chapter Three: The Moonbridge
Chapter Four: Herb Garden
Chapter Five: The Witches Tower
Chapter Six: The Griffins Eyrie
Awakening 2: Der Mondenwald Abschnitt 1
Awakening 2: Der Mondenwald Abschnitt 2
Awakening 2: Der Mondenwald Abschnitt 3
Ask for help in the comments below!
Chapter One: The River
Chapter Two: Teardrop Falls
Chapter Three: The Moonbridge
Chapter Four: Herb Garden
Chapter Five: The Witches Tower
Chapter Six: The Griffins Eyrie
Awakening 2: Der Mondenwald Abschnitt 1
Awakening 2: Der Mondenwald Abschnitt 2
Awakening 2: Der Mondenwald Abschnitt 3
Ask for help in the comments below!
